You can configure Contact Page Settings using this settings panel.
You can either follow the video or follow the below steps to configure the Contact Page Settings.
Contents
How to Configure Contact Page Address Section?
Note: When you create a Contact page, Please select the Contact Page template in the page attributes to get the predefined Contact Page template.
You can add contact address widget for Contact us page.
Please follow the below steps to configure the Contact Page Address Section.
- Login to your WordPress Admin Panel.
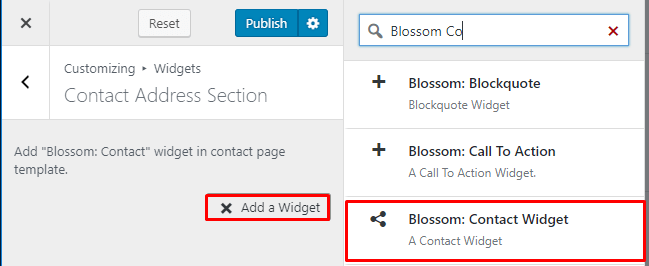
- Go to Appearance > Customize > Contact Page Settings > Contact Address Section
- Click Add a Widget.
- Select the Blossom: Contact Widget.
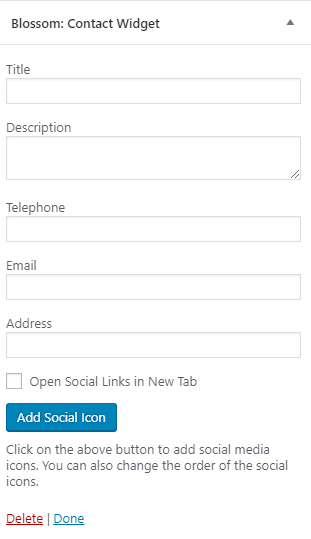
- Enter your title, description, telephone, email, and address.
- Check Open Social Link in New Tab to open social link in new tab.
- Click on Add Social Icon. Search and select the desired social icon and enter their respective link. You can add more social icons by clicking “Add Social Icon”.
- Click on Done.
- Click Add a widget. Add a Text widget.
- Click Publish.
How to Configure Google Map Settings?
Please follow the below steps to configure Google Map Settings.
- Login to your WordPress Admin Panel.
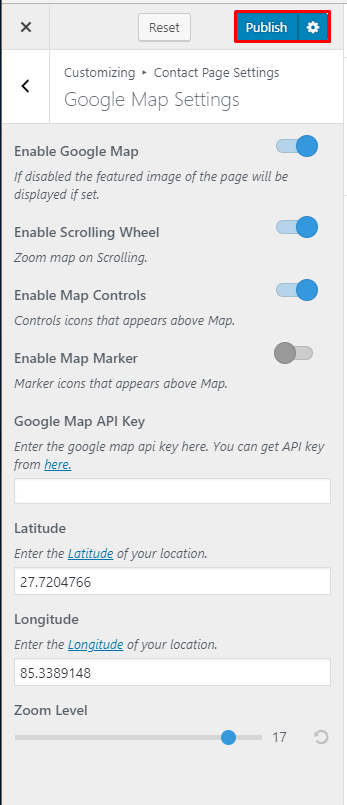
- Go to Appearance > Customize > Contact Page Settings > Google Map Settings
- Enable Google Map to display the Map on the contact page.
- Enable the scrolling to allow zoom function with a scroll.
- Enable Map Controls to display the control icons on the map.
- Enable Map Marker to display the location marker on the map.
- Enter the text message for the contact page.
- Enter the API key for your Google Map.
- Enter your location’s latitude and longitude.
- Set the Zoom Level for your map.
- Click Publish.
How to Configure Contact Form Section?
Please follow the below steps configure Contact Form Section.
- Login to your WordPress Admin Panel.
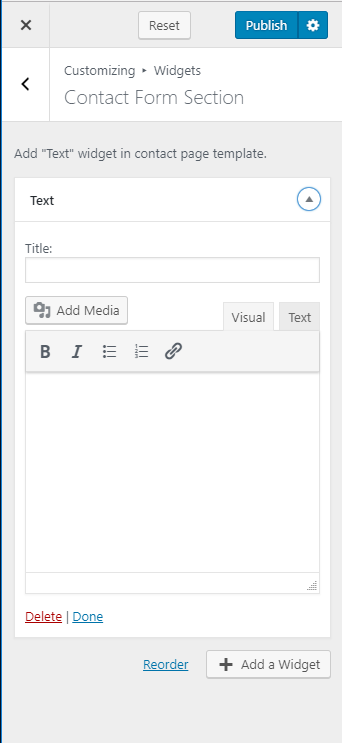
- Go to Appearance > Customize > Contact Page Settings > Contact Form Section.
- Click Add a Widget.
- Select the Text Widget.
- Enter Title. Text and Contact Form 7 Id. ( Please install, activate and use Contact form 7 plugin to generate shortcode for the form) Click Done.
- Click Publish.
How to Configure Contact Page Call to Action Section?
Please follow the below steps to configure Contact Page Call to Action Section.
- Login to your WordPress Admin Panel.
- Go to Appearance > Customize > Contact Page Settings > Contact CTA Widget.
- Click Add a Widget.
- Select the Blossom: Call To Action Widget.

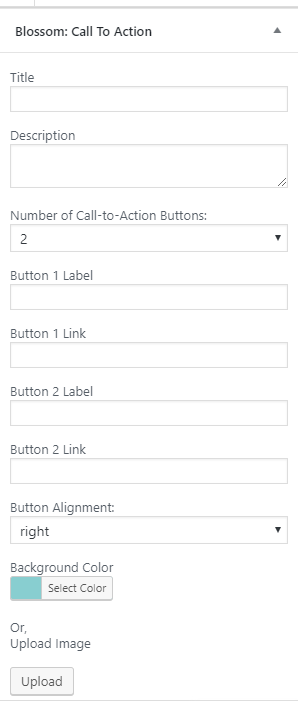
- Enter Title and Description for your Call to Action Section. Choose the number of Call to Action Buttons. Enter Button 1 Label and Button 1 link. Enter Button 2 Label and Button 2 link. ( if you have selected two Call to Action Buttons). Choose Button Alignment. Choose a background color for the section or upload an image by clicking on Upload Image button.
- Click Done.
- Click Publish.
Updated on