The Shopexcel theme supports a single menu on the site header. You can create and add menu either via the site dashboard or via the customizer.
Creating Menu from Customizer
- Navigate to Admin Dashboard > Appearance > Customize > Core > Menus.
- Click on Create New Menu button.
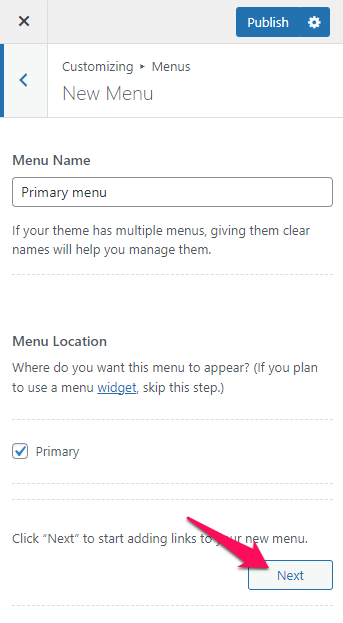
- Enter Menu Name and select the Menu Location.
- Click on Next.
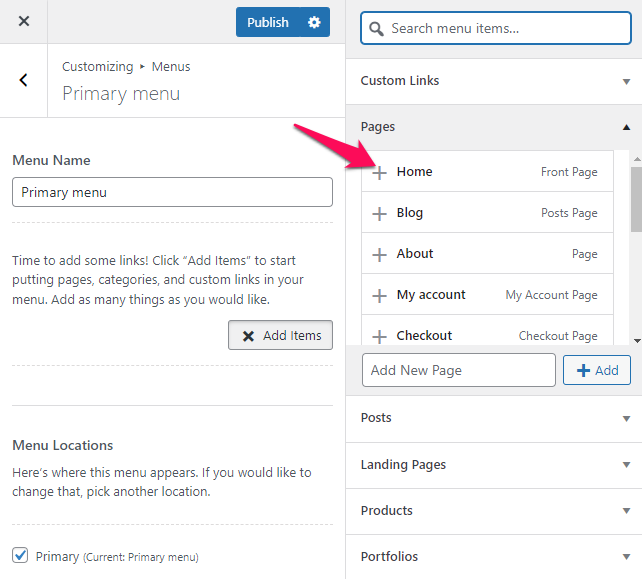
- Click Add Items to add items (pages, posts, categories, custom links…) to the Menu.
- Click “+” icon on the items list to add the item to the menu.
- Drag and Drop the added items to rearrange them.
- Click Publish.
Creating Menu from Dashboard
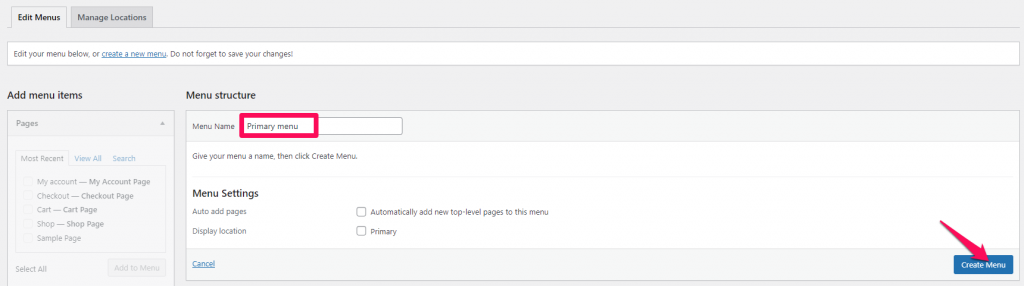
- Navigate to Admin Dashboard > Appearance > Menus.
- Enter the Menu Name and click on Create Menu button.
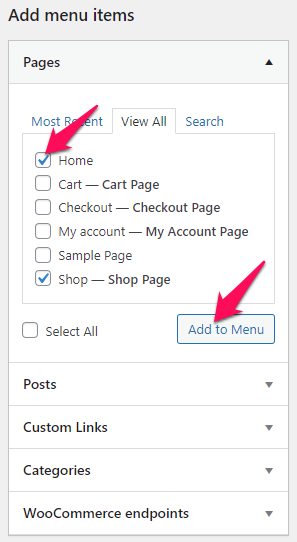
- Select the items from Pages, Posts, Custom Links, or Categories and click “Add to Menu”
- Drag and Drop the added items to rearrange them.
- Check the Menu Display location as Primary.

- Finally, click on Save Menu.