You can choose a slider as your banner. The banner will be displayed at the top of your website.
To set up your banner:
- Go to Appearance > Customize > Front Page Settings > Banner Section.
- Choose either Banner as Slider, or Disable Banner Section (if you do not want a banner).
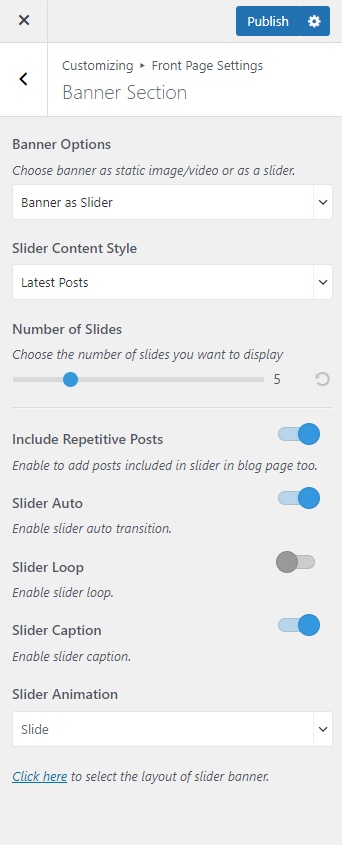
Banner as Slider
Note: Before you choose Latest Posts or Category in the Slider Content Style, make sure that you have created these beforehand. You can create Posts via Posts > Add New and Category via Posts > Categories. If there are not enough Posts or Categories, a grey fallback image will appear in the Banner Section.
- Go to Appearance > Customize > Front Page Settings > Banner Section.
- Choose Banner as Slider in the Banner Options.
- Select either Latest Posts or Category in the Slider Content Style.
- Control the number of slides to be displayed through the Number of Slides option.
- Enable Include Repititive Posts to add posts included in slider in blog page too.
- Enable Slider Auto for the auto transition of the slider.
- Enable Slider Loop for the continuation of the slider.
- Enable Slider Caption to display text on the slider.
- Select the animation of the slider through the Slider Animation option.
- Click Publish.