With the Modern Theme Styling, the Blossom Feminine Pro theme introduces a fresh and advanced set of design and layout options for its users.
Theme users following the Classic styling can switch to the Modern styling via Admin Dashboard > Appearance > Customize > Theme Styling.
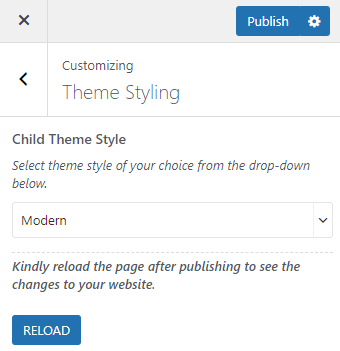
Once the Modern styling option is selected, click on Publish to save the setting and then click on Reload to reload the page and make the new settings appear on the site customizer.
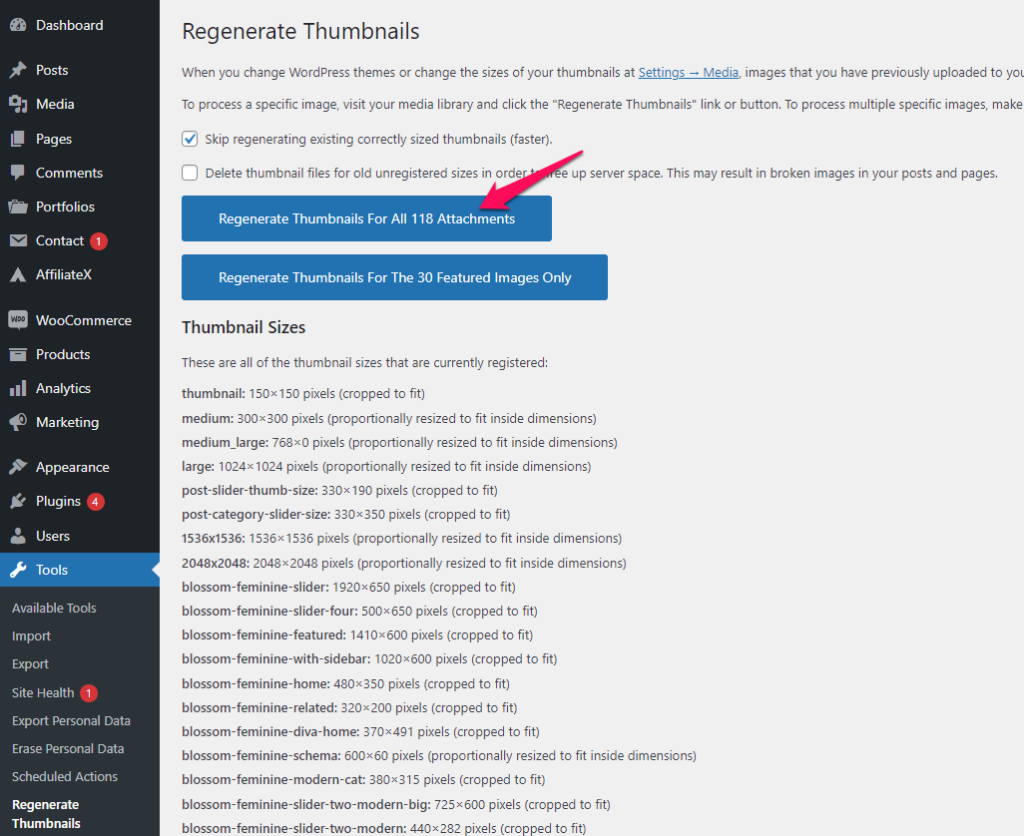
Note: While switching from the Classic styling to the Modern styling, there is a change in existing layout and design which further yields change of the thumbnail image size. Therefore, Regenerating Thumbnails is an essential step to ensure that your site images match the new design requirements.
You can follow the below listed steps to regenerate thumbnails for all images uploaded on your website.
- Navigate to Admin Dashboard > Tools > Regenerate Thumbnails.
- Click on the Regenerate Thumbnails For All Attachments button.
Contents
Importing a Gutenberg Page Template
The Modern Styling for the Blossom Feminine Pro theme allows you to import Gutenberg Page Templates on your website without affecting the existing content of your website.
You will be needing to install and activate the PostX – Gutenberg Post Grid Blocks plugin for importing these templates.
The following are the steps to be followed:
- Go to Admin Dashboard > Pages > Add New and enter the page title.
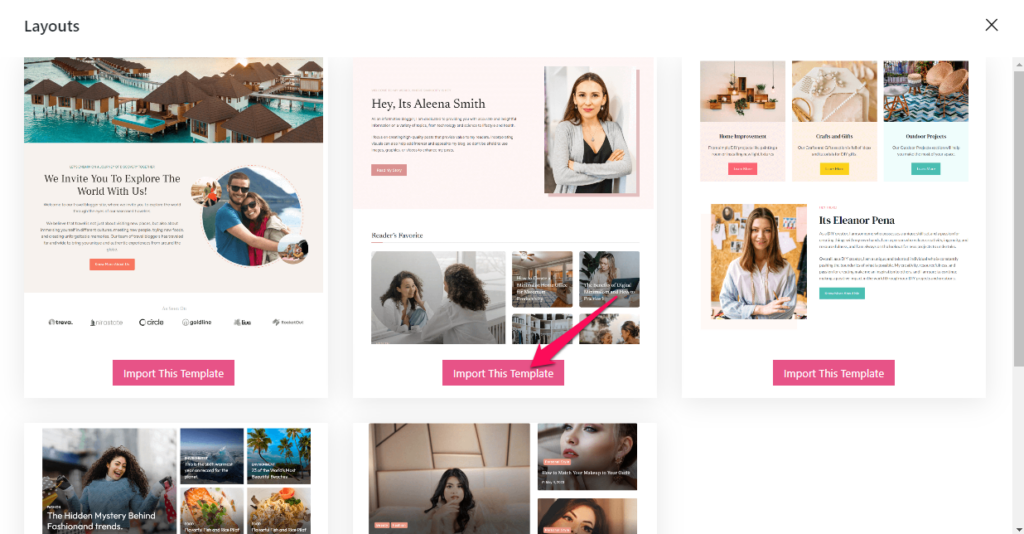
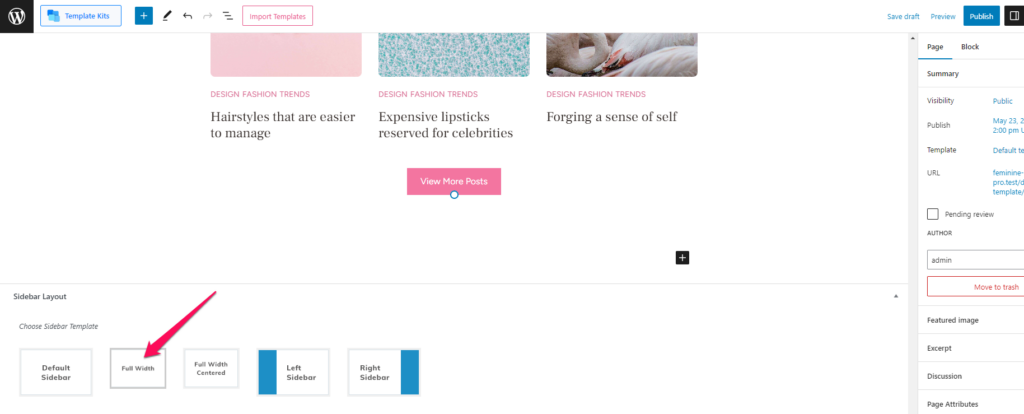
- Click on Import Templates button.

- Further, click on the Import This Template button for the page template that you want to import.
- Inside the Page tab, under the Template option, select PostX Template (Without Title).
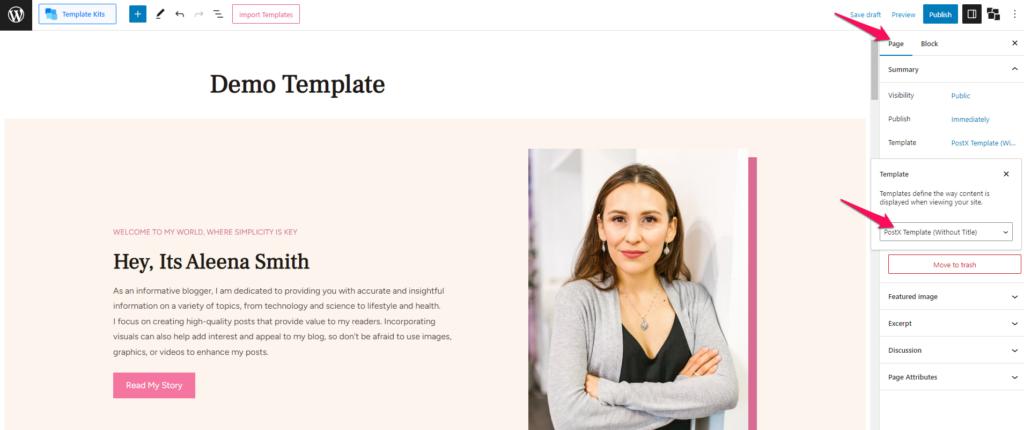
- Select the Full Width page layout.
- Click on Publish to save the changes made.
Modern Styling Settings
The following are the different settings provided for configuring the Blossom Feminine Pro theme with the Modern styling:
Colors Settings
You can select colors for different elements of your website via the Colors Settings. For this, navigate to Admin Dashboard > Appearance > Customize > Colors.
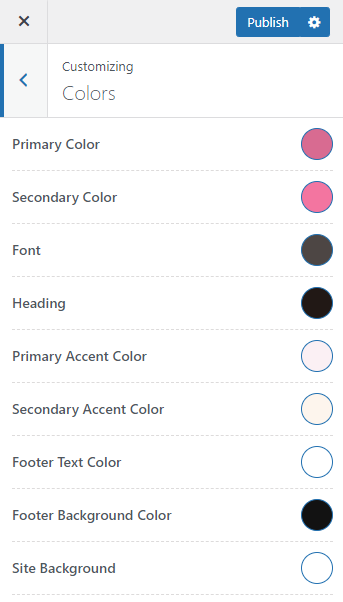
Primary Color: Select the Primary color for your website.
Secondary Color: Choose the Secondary color for your website.
Font: Select a color for all the general site text.
Heading: Select a color for all the site headings.
Primary Accent Color: You can set the primary accent color for the Elementor templates used on your website via this setting.
Secondary Accent Color: You can set the secondary accent color for the Elementor templates on your website here.
Footer Text Color: Select a color for the site footer text.
Footer Background Color: Select the footer background color.
Site Background: Select a background color to apply for the entire website.
Typography Settings
The Typography settings allow you to select font-family, font-size, line-height, letter-spacing, font-weight and capitalization type for the different types of texts used on your website.
You can access the Typography Settings via Admin Dashboard > Appearance > Customize > Typography.
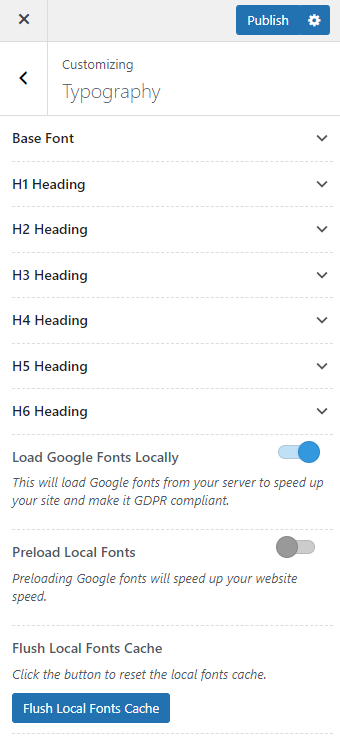
Base Font – You can select the Base font family and settings for your website here.
Headings – The typography settings selected for this text type applies to the site headings.
Load Google Fonts Locally – Enable this option to load Google Fonts from your server. This will help to speed up your website.
Preload Local Fonts – Enable this option to activate preloading of Google Fonts.
Flush Local Fonts Cache – Click on the Flush Local Fonts Cache button to clear the local fonts cache.
Layout Settings
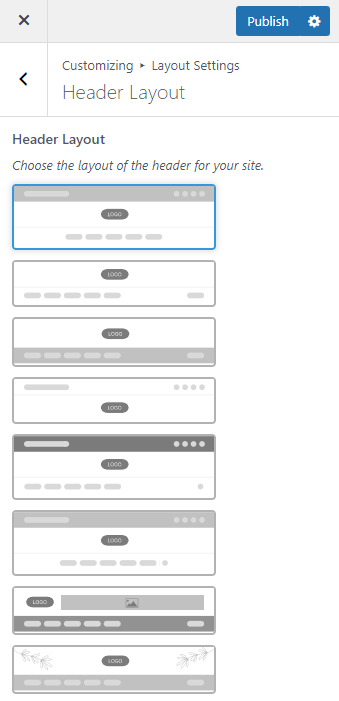
You can set the header layout, slider layout, featured area layout, sticky post layout, homepage layout, single post layout and pagination layout inside the Layout Settings.
You can access the Layout Settings via Admin Dashboard > Appearance > Customize > Layout Settings.
Header Layout
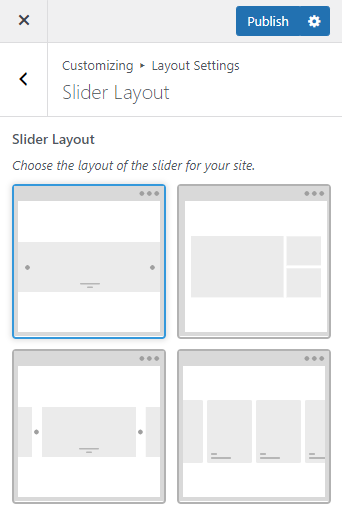
Slider Layout
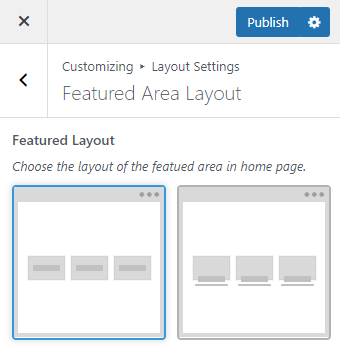
Featured Area Layout
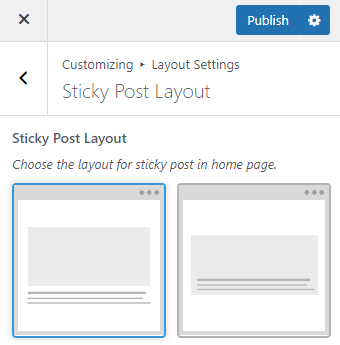
Sticky Post Layout
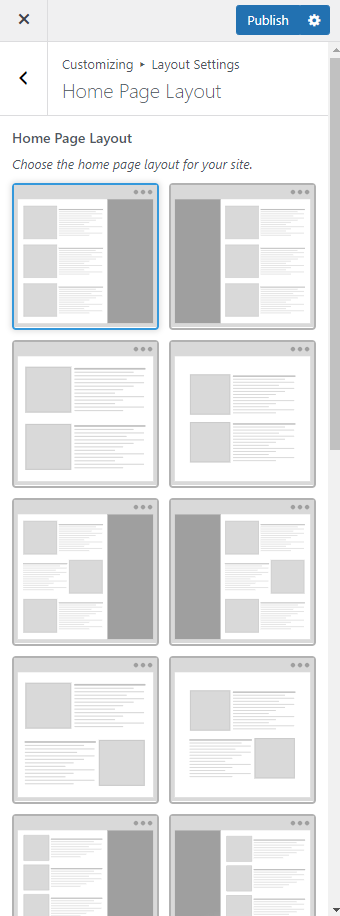
Home Page Layout
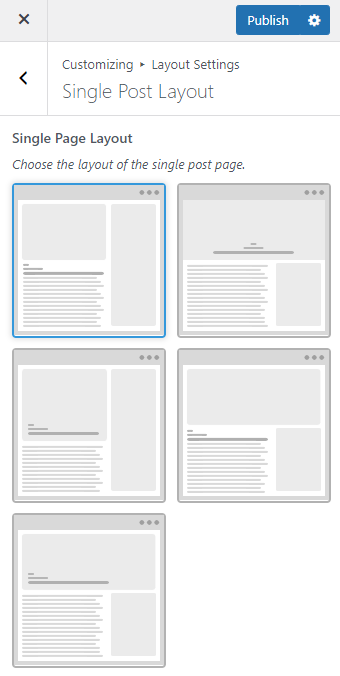
Single Post Layout
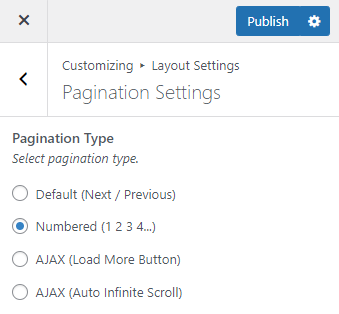
Pagination Settings
Appearance Settings
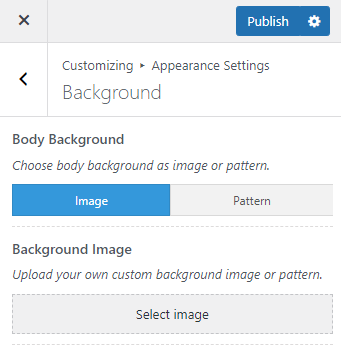
You can set a background for your website via this setting. You can either add an image or choose an existing pattern as the site background.
The Background Setting can be accessed via Admin Dashboard > Appearance > Customize > Appearance Settings > Background.
General Settings
Container Settings
A container is an element that holds all your site contents. You can access the Container Settings via Admin Dashboard > Appearance > Customize > General Settings > Container.
The following are the settings that you can use to manage your site container.
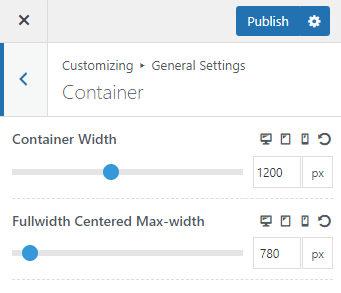
Container Width: You can set the site container width for different devices via this option.
Fullwidth Centered Max-width: This setting sets the container width for a full-width centered layout.
Top Bar Settings
You can add a Notification Bar to your website via this option where you can highlight any helpful piece of information for your site visitors.
You can configure the Top Bar Settings for your website via Admin Dashboard > Appearance > Customize > General Settings > Top Bar Settings.
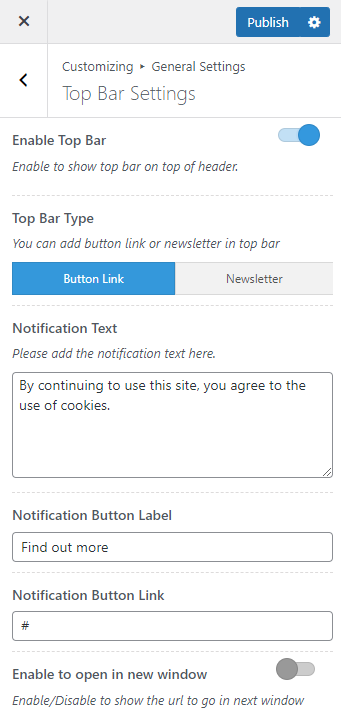
Enable Top Bar: You need to enable this option to display the notification bar on your website.
Top Bar Type: Choose to either add a button link or a newsletter form on the Top Bar.
Notification Text: Enter the notification text here.
Notification Button Label: Enter the notification button label here.
Notification Button Link: Enter the URL to which you want the notification button to link to.
Enable to open in new window: Enable this option to open the button URL in new tab.
Hide on Mobile: Enable this option if you want to hide the notification bar in mobile view.
Header Newsletter Shortcode: This option is only visible only the Newsletter option is selected for the Top Bar Type. You can enter the newsletter shortcode inside this field.
Slider Settings
The Slider Settings comprises of the configuration options for the banner slider.
You can access the Slider Settings via Admin Dashboard > Appearance > Customize > General Settings > Slider Settings.
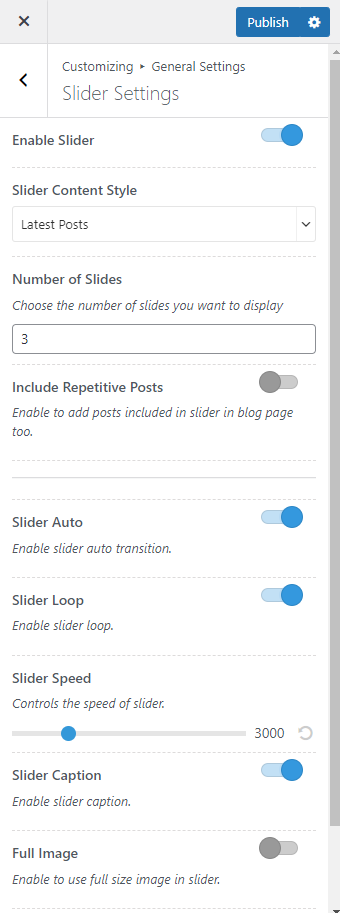
Enable Slider: Enable this option to display the banner slider on the homepage.
Slider Content Style: Choose your preferred slider content.
Number of Slides: Choose the number of slides you want to display.
Include Repetitive Posts: Enable to add the posts included in slider in the blog page too.
Slider Auto: You can enable slider auto transition via this option.
Slider Loop: Enable slider loop via this option.
Slider Speed: Set the speed of the slider in milliseconds.
Slider Caption: Enable this option to display the caption on the banner slider.
Full Image: Enable this option to use full size image in slider.
Slider Animation: Select your preferred slider animation.
Slider Category: This option appears when you choose Category as the Slider Content Style. Here, you can select a category of blog post that you want to display on the banner slider.
Slider Pages: This option appears when you choose Pages as the Slider Content Style. Click on the Add new pages button and then select a page that you want to highlight on the banner slider.
Add Sliders: This option appears when you choose Custom as the Slider Content Style. Click on the Add new Slide button to create a custom slide for your banner slider.
Featured Area Settings
The Featured Area Section can be used to highlight important pages on your site which you do not want to be left unnoticed.
You can access the Featured Area Settings via Admin Dashboard > Appearance > Customize > General Settings > Featured Area Settings.
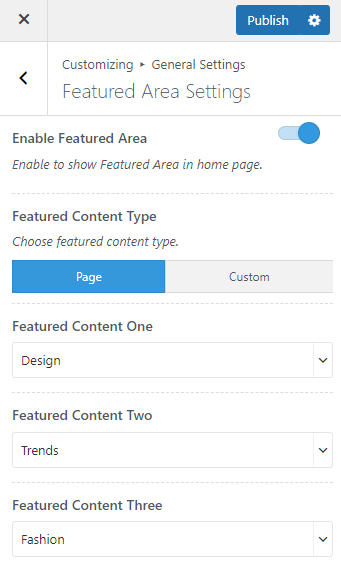
Enable Featured Area: Enable this option to display the Featured Area Section on the homepage.
Featured Content Type: You can choose to highlight existing Pages on the Featured Area Section or opt to add Custom content.
Featured Content One/Two/Three: When the Page option is selected, these selection options are visible. Choose your preferred pages for the Featured Area Section.
Open in New Window: Enable this option to open the button link in new tab.
Add featured content: Click on the Add new featured content button and add custom information for the Featured Area Section.
Social Media Settings
You can set your social network accounts via Admin Dashboard > Appearance > Customize > General Settings > Social Media Settings.
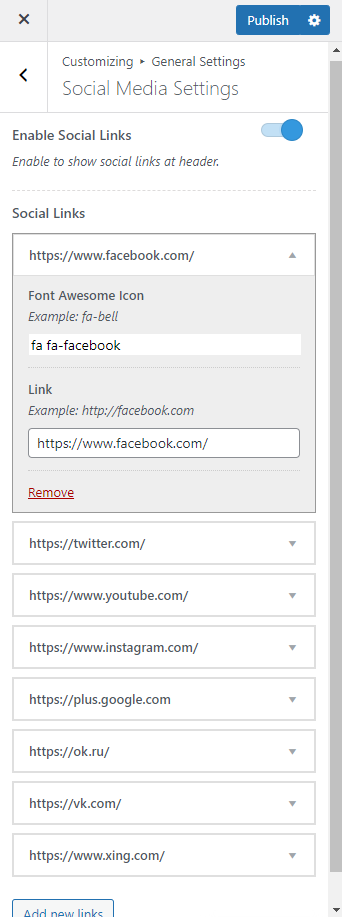
Enable Social Links: Enable this option to display social links on the site header.
Add new links: Click on Add new links button to add the social link field. Further, select the social icon and enter the respective social media link.
Social Sharing
This feature can be used to share the blog posts on your site on various social media platforms.
You can configure the Social Sharing Setting via Admin Dashboard > Appearance > Customize > General Settings > Social Sharing.

Enable Social Sharing Buttons: Enable this option to display the social sharing buttons for your site posts.
Enable Open Graph Meta Tags: Disable this option if you’re using Jetpack, Yoast or other plugin to maintain Open Graph meta tags.
Social Sharing Buttons: Click on the eye icon at the beginning of a social network to enable or disable it.
SEO Settings
The SEO settings comprises of the Breadcrumb setting and Post Date setting for the website. You can access it via Admin Dashboard > Appearance > Customize > General Settings > SEO Settings.
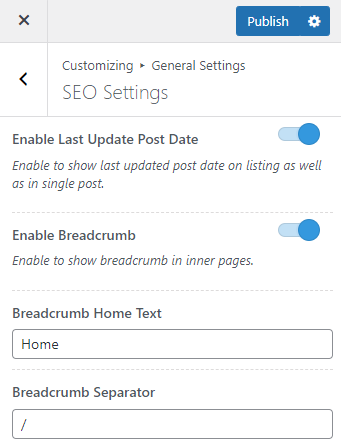
Enable Last Update Post Date: Enable this option to display the date when a post was last updated. When you enable this, Google can read the post updated date and index your latest content.
Enable Breadcrumb: Enable this option to display breadcrumb on your website.
Breadcrumb Home Text: Enter the text with which you want to represent the Homepage on the breadcrumb.
Breadcrumb Separator: Select the type of separator that you prefer.
Posts(Blog) & Pages Settings
You can configure the layout and components of the blog posts and pages created on your website via this setting. You can access the Posts(Blog) & Pages Settings via Admin Dashboard > Appearance > Customize > General Settings > Posts(Blog) & Pages Settings.
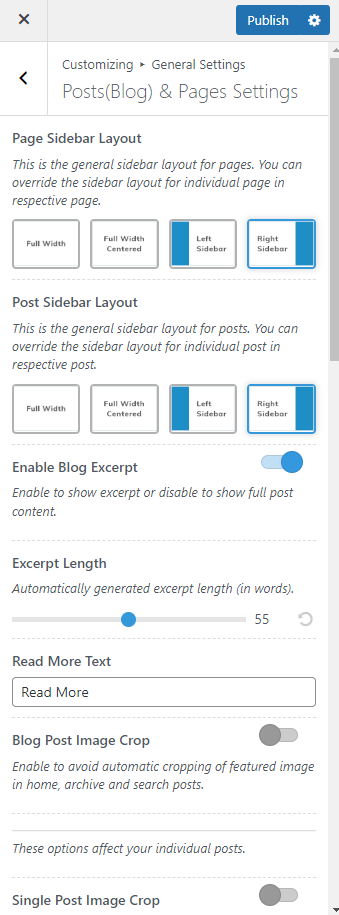
Page Sidebar Layout: Choose a general sidebar layout for your site pages.
Post Sidebar Layout: Choose a general sidebar layout for your site posts.
Enable Blog Excerpt: Enable this option if you want to display the excerpt of the posts.
Excerpt Length: Select the number of words for the blog excerpt.
Read More Text: Enter the read more text label.
Blog Post Image Crop: Enable this option to avoid automatic cropping of featured image in home, archive and search posts.
Single Post Image Crop: Enable this option to avoid automatic cropping of featured image in single post.
Show Related Posts: Enable this option to display Related Posts section in single post.
Related Posts Section Title: Enter the Related Posts Section Title here.
Related Post Taxonomy: You can choose to display the Related posts on a single post page based on either Category or Tags.
Show Popular Posts: Enable this option to display Popular Posts section in single post.
Popular Posts Section Title: Enter the Popular Posts Section Title.
Portfolio Single Related Title: Enter the Related Portfolio Section Title.
Show Comments: Enable this option to show Comments in Single Post/Page.
Toggle Comment Section: Enable Toggle Comment Section to show the comment section right below the post content. You have to save the changes and refresh the page to see the changes.
Hide Category: Enable Hide Category if you don’t want to show the category name on blog posts.
Hide Post Author: Enable this option if you don’t want to show the author section on the blog posts.
Hide Posted Date: Enable Hide Posted Date if you don’t want to show posted date on blog posts.
Show Featured Image: Enable Show Featured Image to show the featured image on the blog posts.
Hide Prefix in Archive Page: Enable this option if you want to hide the prefix “Category:” from the category archive page.
Author Signature: Upload an author signature image to display at the end of single posts.
Enable Social Links: Enable this option to show the social links below the author signature.
Author Signature Alignment: Choose alignment for the author signature.
Newsletter Settings
You can enable and add Newsletter Section on your site pages and posts via the Newsletter Settings.
You can access the Newsletter Settings via Admin Dashboard > Appearance > Customize > General Settings > Newsletter Settings.
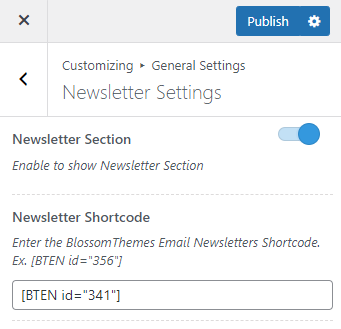
Newsletter Section: Enabling this option will allow you to display the Newsletter Section on your site pages and posts.
Newsletter Shortcode: Enter the newsletter shortcode inside this field.
Instagram Settings
You can enable the Instagram Section on your website homepage via this setting. The Instagram Settings is accessible via Admin Dashboard > Appearance > Customize > General Settings > Instagram Settings.
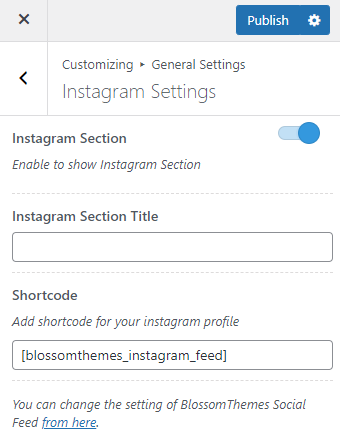
Instagram Section: Enable this option to show Instagram Section on the homepage.
Instagram Section Title: Enter the title for the Instagram Section.
Shortcode: Enter the shortcode for your instagram profile.
Misc Settings
You can access the Miscellaneous settings for the Blossom Feminine Pro theme via Admin Dashboard > Appearance > Customize > General Settings > Misc Settings.
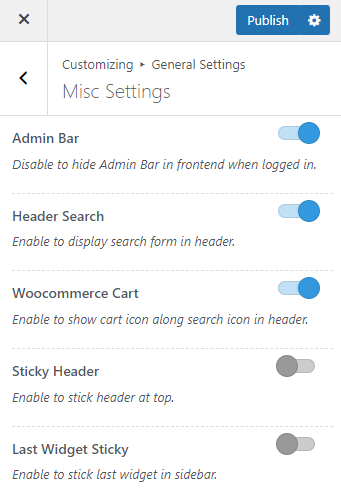
Admin Bar: Disable this option to hide the Admin Bar in site frontend when logged in.
Header Search: Enable this option to display search form in header.
Woocommerce Cart: Enable the option to show cart icon on the site header.
Sticky Header: Enable the option to stick header at top.
Last Widget Sticky: Enable the option to stick last widget in sidebar.
Shop Settings
You can configure the Shop page settings for your website via Admin Dashboard > Appearance > Customize > General Settings > Shop Settings.
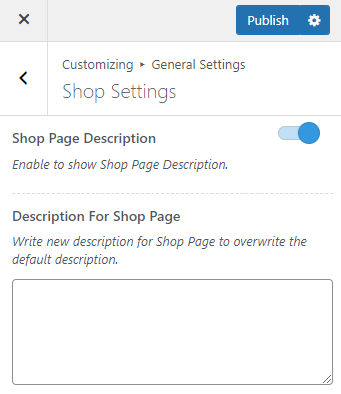
Shop Page Description: Enable the option to show Shop Page Description on the Shop Page header.
Description For Shop Page: Here, you can enter new description for the Shop page to overwrite the default description.
Google Analytics Settings
The Blossom Feminine Pro theme provides you with inbuilt field to add Google Analytics code on your website. You can access this field via Admin Dashboard > Appearance > Customize > General Settings > Google Analytics Settings.

Sidebar Settings
The Blossom Feminine Pro theme allows its users to create multiple sidebars and add different sidebar to the homepage and single page and post page.
You can configure the Sidebar Settings via Admin Dashboard > Appearance > Customize > Sidebar Settings.
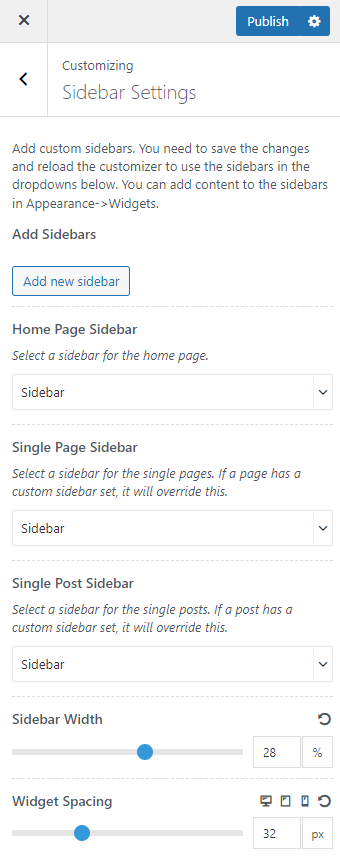
Add Sidebars: Click on Add new sidebar button and enter the name for your new sidebar. Upon publishing the changes made and then refreshing the page, the newly created sidebar will be available under the dropdown options for sidebar.
Home Page Sidebar: Select your preferred sidebar for the homepage.
Single Page Sidebar: Select a sidebar for the single pages.
Single Post Sidebar: Select a sidebar for the single posts.
Sidebar Width: Set the width value for the sidebar.
Widget Spacing: Set the spacing between widgets in the sidebar.
Advertisement Settings
You can use the Advertisement Settings to display Ad across different places on your website. These Ads can be placed via the Ad code or by uploading an image banner. The Advertisement Settings can be configured via Admin Dashboard > Appearance > Customize > Advertisement Settings.
Before Posts Archive AD Settings
You can use this setting to display Ad block before the Posts list in home/archive page.

Enable AD Before Posts: Enable this option to display Ad before Posts in home/archive page.
Enable Before Posts AD Code: Enable this code if you want to display the Ad via Adsense ad code.
Before Posts AD Code: Enter the Adsense ad code inside this field. This field is only visible when the Enable Before Posts AD Code option is enabled.
Open Link in Different Tab: Enable this option to open the Ad link in a new tab.
Upload Before Posts AD: Select an image to display as the Ad banner.
Before Posts AD Link: Enter the URL to which you want the Ad banner image to link to.
After Posts Archive AD Settings
You can use this setting to display Ad block after the Posts list in home/archive page.

Enable AD After Posts: Enable this option to display Ad after Posts in home/archive page.
Enable After Posts AD Code: Enable this code if you want to display the Ad via Adsense ad code.
After Posts AD Code: Enter the Adsense ad code inside this field. This field is only visible when the Enable After Posts AD Code option is enabled.
Open Link in Different Tab: Enable this option to open the Ad link in a new tab.
Upload After Posts AD: Select an image to display as the Ad banner.
After Posts AD Link: Enter the URL to which you want the Ad banner image to link to.
Before Content AD Settings
You can use this setting to display Ad block before the post content in single post page.

Enable AD Before Content: Enable this option to display Ad before post content in single post page.
Enable Before Content AD Code: Enable this code if you want to display the Ad via Adsense ad code.
Before Content AD Code: Enter the Adsense ad code inside this field. This field is only visible when the Enable Before Content AD Code option is enabled.
Open Link in Different Tab: Enable this option to open the Ad link in a new tab.
Upload Before Content AD: Select an image to display as the Ad banner.
Before Content AD Link: Enter the URL to which you want the Ad banner image to link to.
After Content AD Settings
You can use this setting to display Ad block after the post content in single post page.
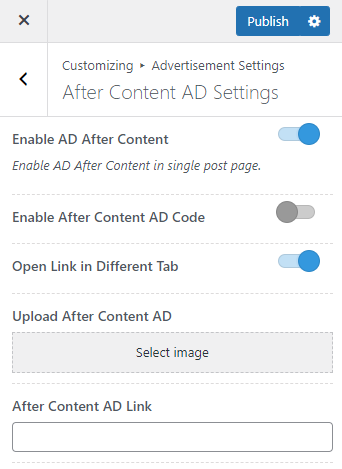
Enable AD After Content: Enable this option to display Ad after post content in single post page.
Enable After Content AD Code: Enable this code if you want to display the Ad via Adsense ad code.
After Content AD Code: Enter the Adsense ad code inside this field. This field is only visible when the Enable After Content AD Code option is enabled.
Open Link in Different Tab: Enable this option to open the Ad link in a new tab.
Upload After Content AD: Select an image to display as the Ad banner.
After Content AD Link: Enter the URL to which you want the Ad banner image to link to.
Performance Settings
The Performance settings includes various options with which you can optimize different elements building up your website.
You can access the Performance Settings via Admin Dashboard > Appearance > Customize > Performance Settings.
The Blossom Feminine Pro theme offers optimization options for the following elements of a website.
- Images
- WordPress
- CSS/JS Optimization
- Elementor
- WooCommerce
Images
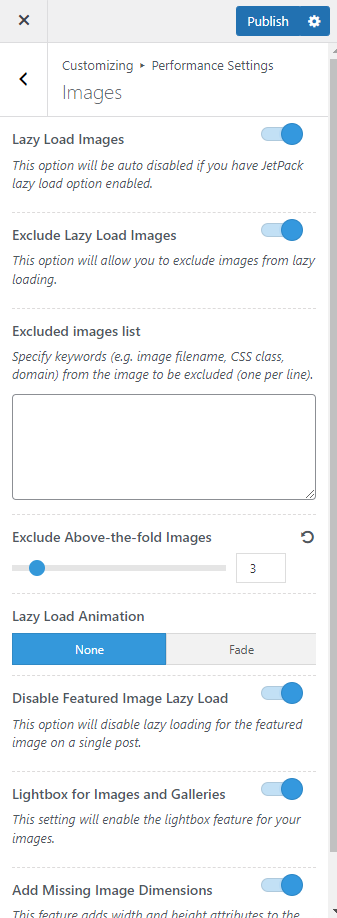
Lazy Load Images: Enable this option to activate Lazy loading for your site images.
Exclude Lazy Load Images: You can enable this option to exclude images from lazy loading.
Excluded images list: This option is visible only when the Exclude Lazy Load Images option is enabled. Enter keywords (e.g. image filename, CSS class, domain) from the image to be excluded (one per line).
Exclude Above-the-fold Images: You can select the number of images on the homepage from the top for which you want to exclude the lazy loading.
Lazy Load Animation: Select animation effect for the lazy loading images. This option is only visible when the Lazy Load Images option is enabled.
Disable Featured Image Lazy Load: Enabling this option will disable lazy loading for the featured image on single post.
Lightbox for Images and Galleries: You can enable the lightbox feature for your images.
Add Missing Image Dimensions: Enabling this feature will add width and height attributes to the images to improve the CLS.
WordPress
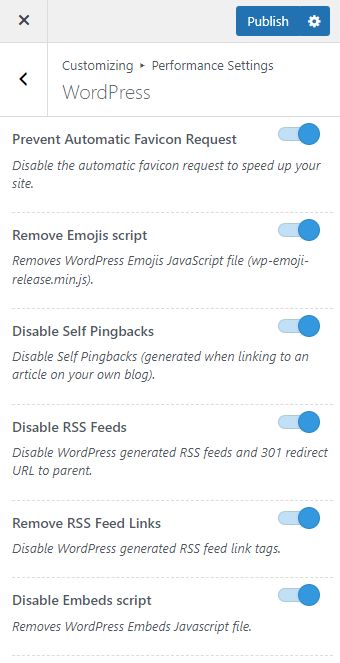
Prevent Automatic Favicon Request: Enabling this option will disable the automatic favicon request to speed up your site.
Remove Emojis script: You can remove WordPress Emojis JavaScript file from your website frontend.
Disable Self Pingbacks: Enabling this option will disable Self Pingbacks (generated when linking to an article on your own blog).
Disable RSS Feeds: Enable this option to disable WordPress generated RSS feeds and 301 redirect URL to parent.
Remove RSS Feed Links: Enable this option to disable WordPress generated RSS feed link tags.
Disable Embeds script: Enabling this option will remove WordPress Embeds Javascript file.
CSS/JS Optimization
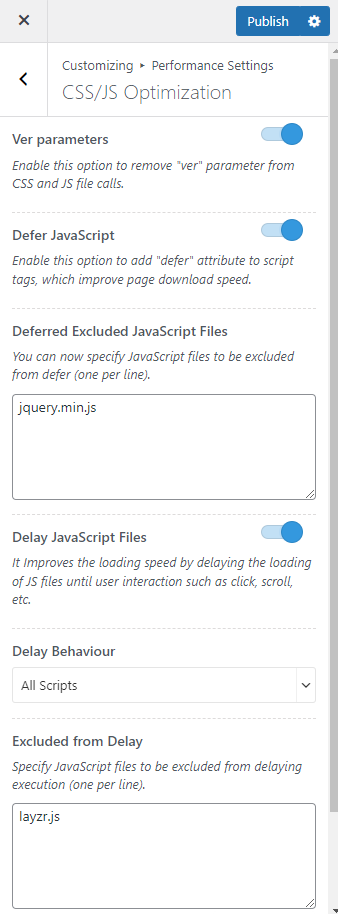
Ver parameters: Enable this option to remove version query strings from your static resources to improve the caching of those resources.
Defer JavaScript: Enable this option to add “defer” attribute to script tags, which improve page download speed.
Delay JavaScript Files: Enabling this option will improve the loading speed by delaying the loading of JS files until user interaction such as click, scroll, etc.
Elementor
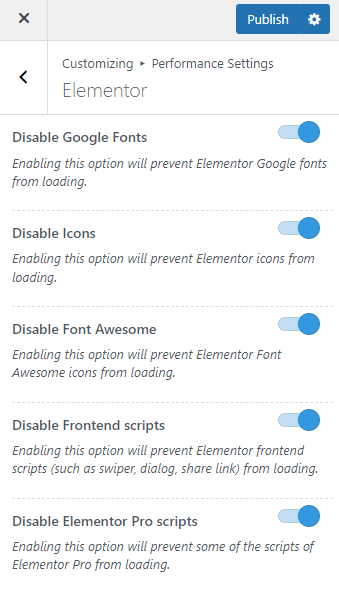
Disable Google Fonts: Enabling this option will prevent Elementor Google fonts from loading.
Disable Icons: Enabling this option will prevent Elementor icons from loading.
Disable Font Awesome: Enabling this option will prevent Elementor Font Awesome icons from loading.
Disable Frontend scripts: Enabling this option will prevent Elementor frontend scripts (such as swiper, dialog, share link) from loading.
Disable Elementor Pro scripts: Enabling this option will prevent some of the scripts of Elementor Pro from loading.
WooCommerce
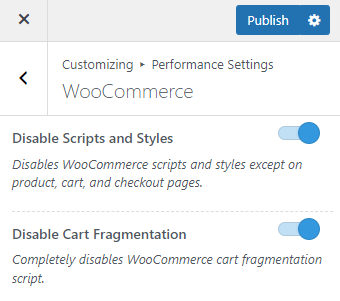
Disable Scripts and Styles: Enabling this option, disables WooCommerce scripts and styles except on product, cart, and checkout pages.
Disable Cart Fragmentation: Enabling this option completely disables WooCommerce cart fragmentation script.
Updated on