You can use this setting to display newsletter on individual posts and enable or disable the newsletter on the top or bottom of the Homepage.
You need to have BlossomThemes Email Newsletter plugin installed and activated for this setting.
You can add a subscription form on the newsletter section of your website from here. To add a newsletter, you need to create a newsletter first and copy & paste the newsletter shortcode.
Creating Newsletters
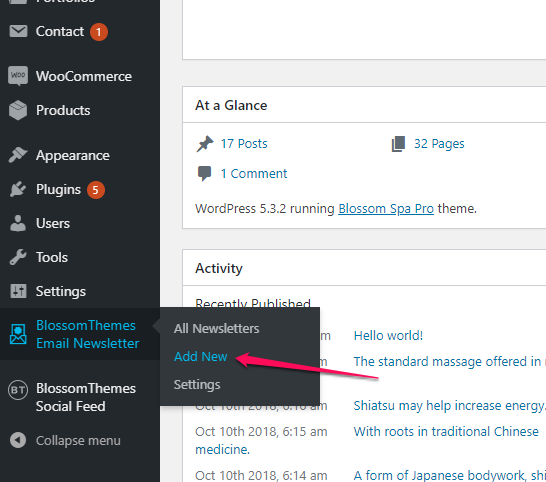
- Go to BlossomThemes Email Newsletter > Add New

- Enter the title for the newsletter.
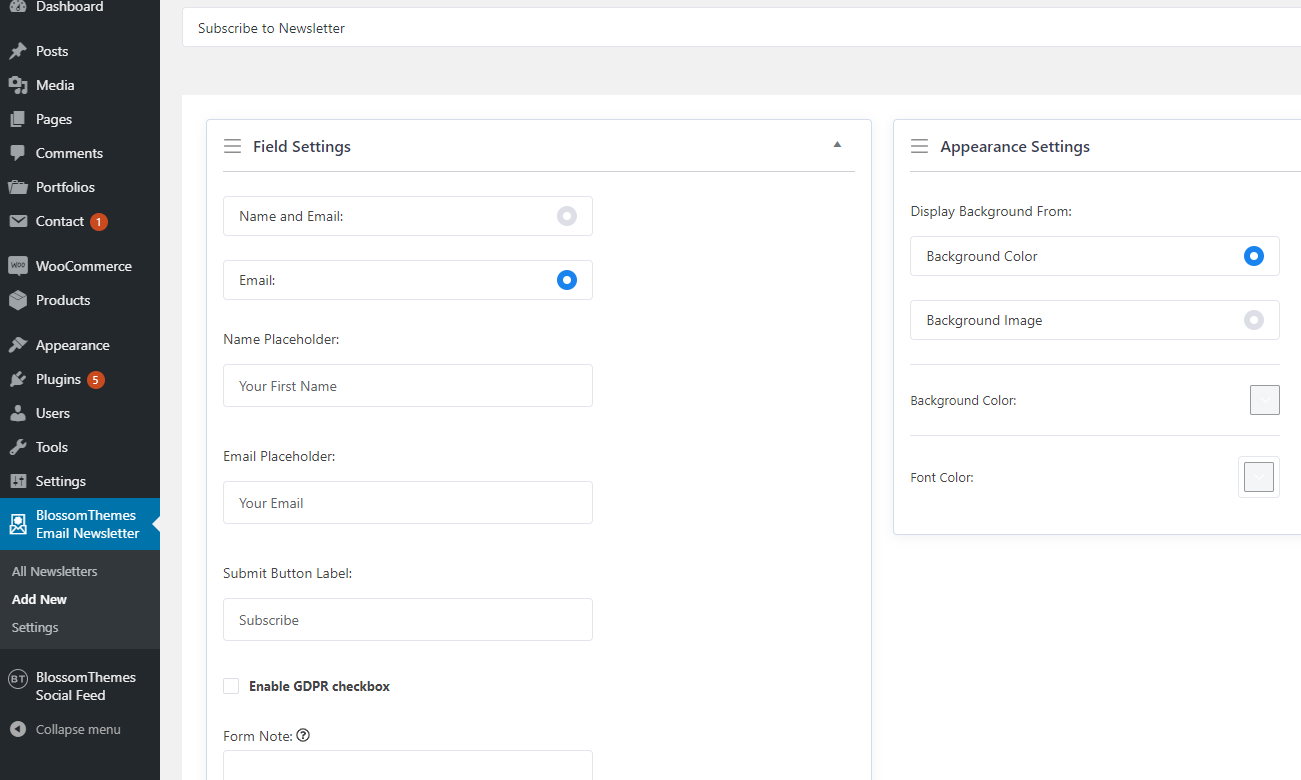
- Select the options on the Field Settings. Select “Name and Email” if you want users to enter their Name and Email to subscribe to your newsletters, otherwise select “Email”.
- Enter Name and Email placeholder.
- Enter the label for Submit button.
- Enter Form note. The note will be displayed below the Title.
- From the Appearance Settings, edit the appearance of the newsletter form.
- Click on Publish to create the newsletter

Configuring Newsletters
- Go to BlossomThemes Email Newsletter > Settings
- Select the email platform.
- Enter the API key of the email platform.
- Select the mailing list in the List Id field.
- Select whether to display Popup text of Page when a visitor subscribes to your newsletter. If you select popup text, enter the message. If you select page, select the page you want to show.
- Click Save Changes.
Adding Newsletter on the Newsletter section
- Go to Appearance > Customize > General Settings > Newsletter Settings
- Enable Newsletter Section. Blue is enabled.
- Enter the shortcode of the newsletter form you want to show. You can find the shortcode on the left-hand side of the newsletter.

- Click Publish.
Then go to Admin Dashboard > Appearance > Customize > General Settings > Newsletter Settings.
- Enable the blue button for Newsletter Section.
- Enter the shortcode of the newsletter.
- Click on Publish.

