You can either follow the video or the below steps to configure this section in the Blossom Feminine Pro theme.
You can also refer to the article guide here for creating a menu in WordPress.
You can create navigation menu from Customizer or from Dashboard. This theme supports two menus: Primary and Secondary. If you need more than two menus, you can add them in the sidebar using “Navigation Menu” widget.
You can either follow the video or read the instructions given
Create a New Menu from Customizer
- Login to your WordPress Dashboard.
- Go to Appearance > Customize> Menus in the WordPress Dashboard
- Click on Create a New menu button
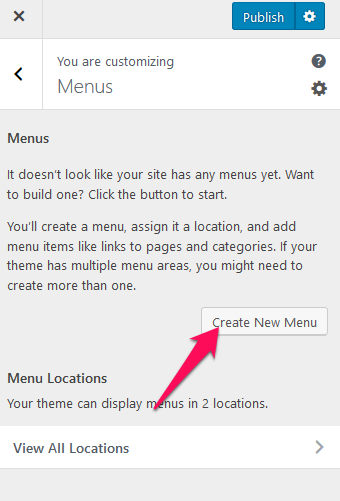
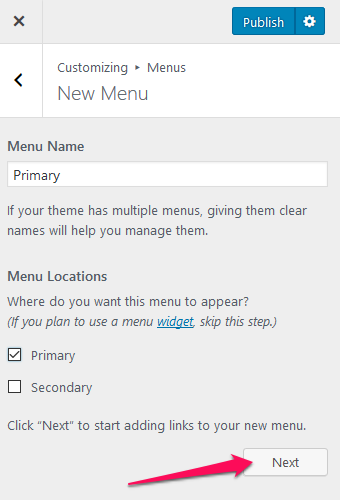
- Give a name to your menu and select whether you want to display the menu on Primary or Secondary location. If you select a primary location, the menu will be displayed below the logo. If you select a secondary location, the menu will be displayed above the logo.
- Click Next
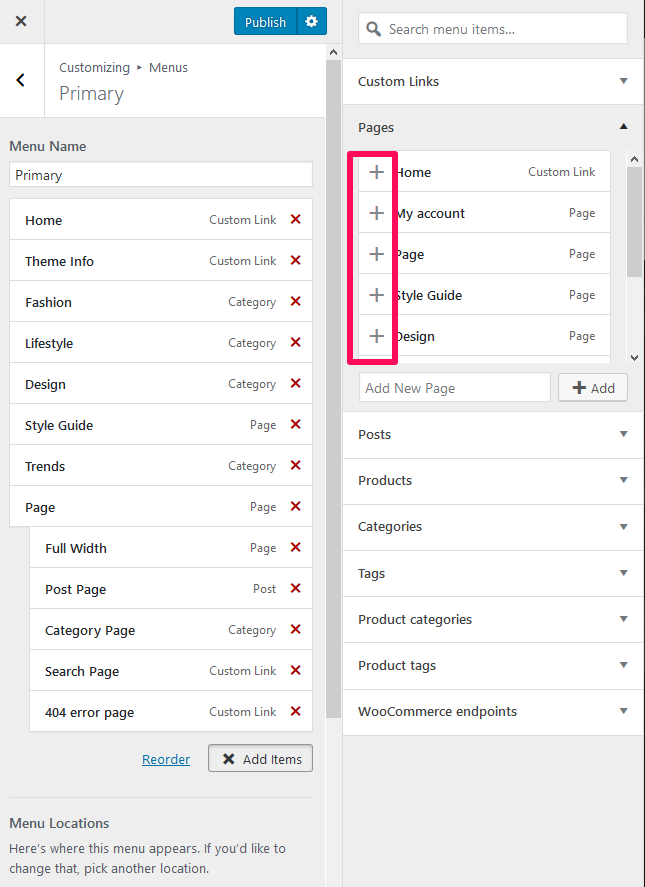
- Click “Add Items” to add items (pages, posts, categories, custom links…) to the Menu
- Click “+” icon on the items list to add the item to the menu
- Drag and Drop the added items to rearrange them.
- Click Publish
Create Menu from Dashboard
- Login to your WordPress Dashboard.
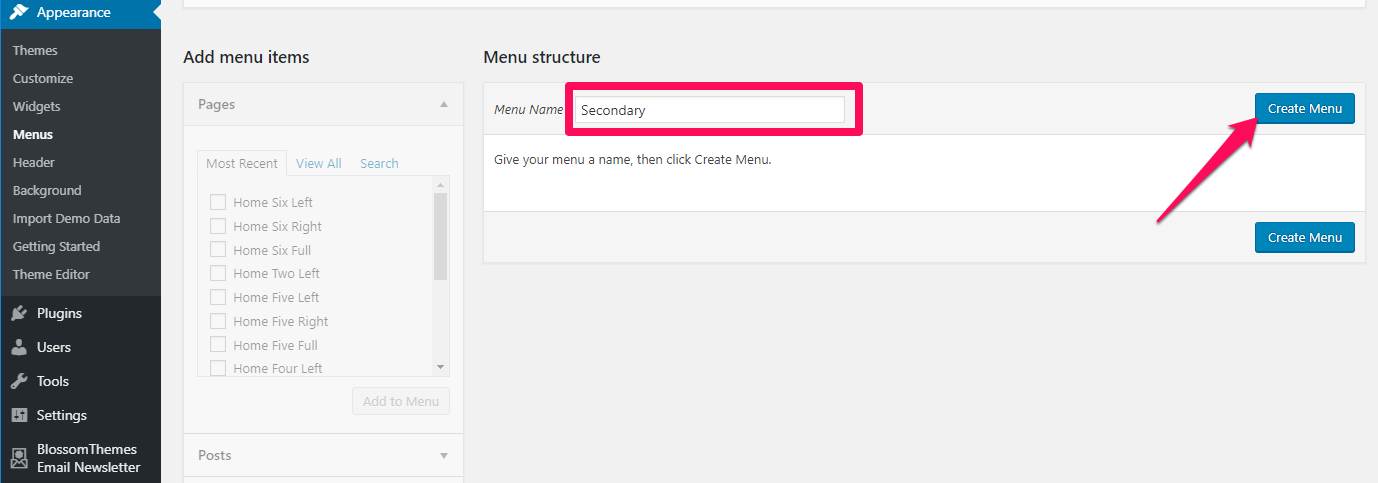
- Go to Appearance > Menus in the WordPress Dashboard
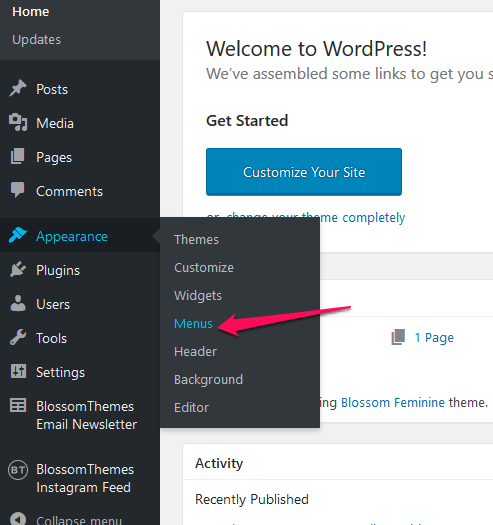
- Click on create a new menu.
- Give a name to your menu in Menu Name and click the Create Menu button.
- Select the items from Pages, Posts, Custom Links, or Categories and click “Add to Menu”.
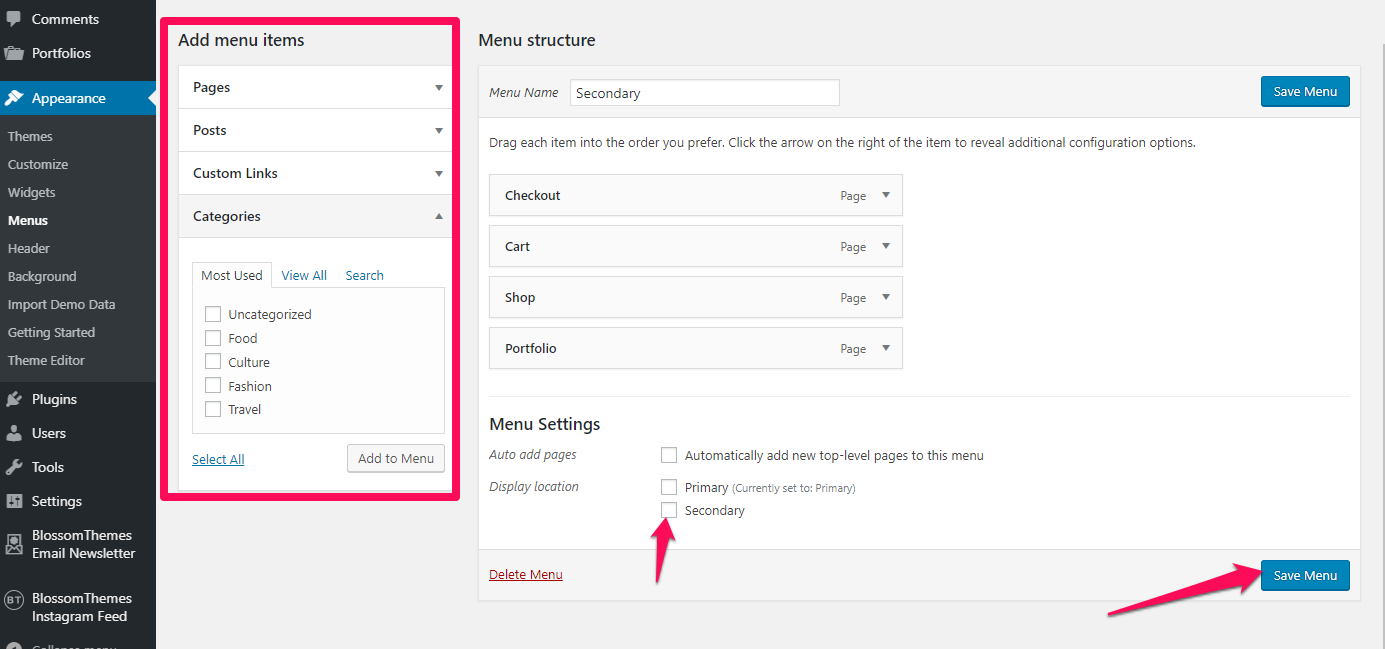
- Drag and Drop the added items to rearrange them.
- Check the Menu location to Primary or Footer
- Click Save Menu
