You can choose a static image, video, or slider to display on your banner section. The banner will be displayed at the top of your website.
Contents
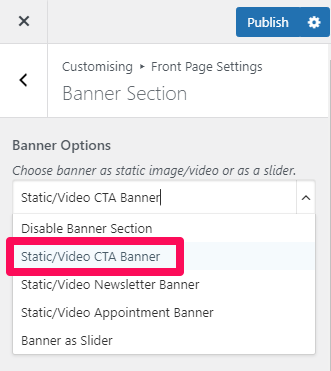
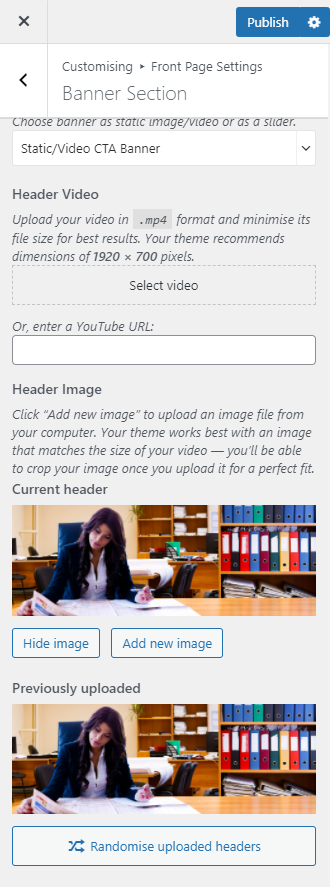
Static/Video CTA Banner
- Log in to WordPress Admin Panel.
- Go to Appearance > Customize > Front Page Settings > Banner Section
- Choose Static/Video CTA Banner under Banner Options. Choose Disable Banner Section if you do not want banner at all.
- Click Select Video and upload a video to your banner section. (Upload your video in .mp4 format and minimize its file size) You can also enter the Youtube video URL.
- Click Add a new image to upload a new image for your banner section. (You can use either video or image banner, not both at once. If you add both, the video banner would be displayed by default.)
- Set the Title, Subtitle, and Description for the static/video CTA banner section.
- Enter the Button Label, Button Link.
- Click Publish.
Static/Video Newsletter Banner
- Login to your WordPress Admin Panel
- Go to Appearance > Customize > Front Page Settings > Banner Section
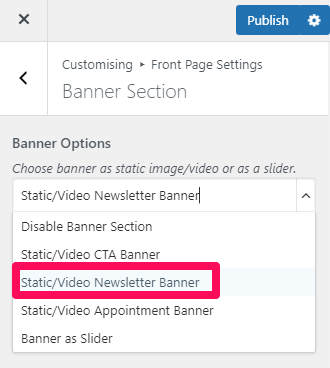
- Choose Static/Video Newsletter Banner under Banner Options. Choose Disable Banner Section if you do not want banner at all.
- Click Select Video and upload a video to your banner section. (Upload your video in .mp4 format and minimize its file size) You can also enter the Youtube video URL.
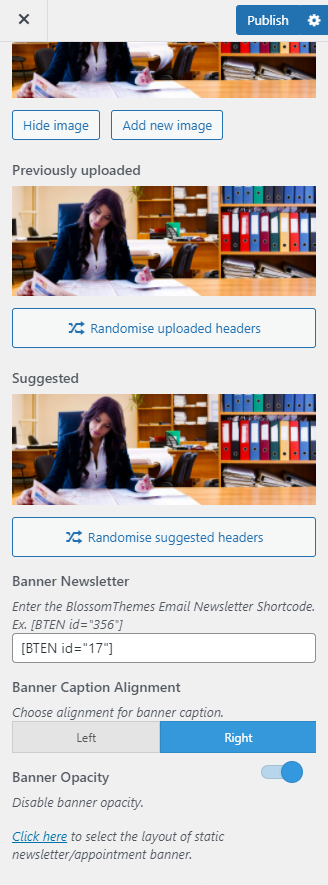
- Click Add a new image to upload a new image for your banner section.
- Enter the Newsletter Shortcode to display the Newsletter on the banner section.
- Select the alignment of the Banner Caption from the Banner Caption Alignment.
- Enable the blue button to enable banner opacity.
- Click Publish.
Static/Video Appointment Banner
- Login to your WordPress Admin Panel
- Go to Appearance > Customize > Front Page Settings > Banner Section
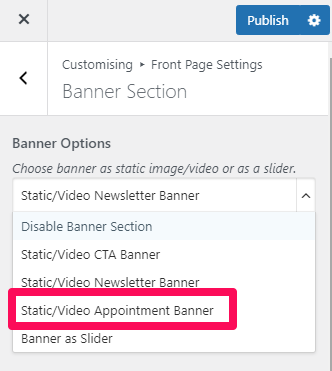
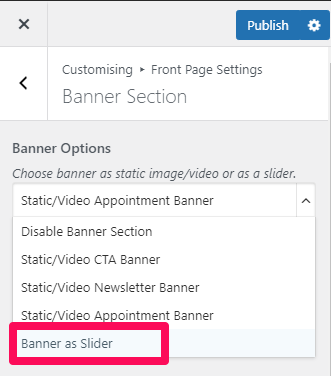
- Choose Static/Video Appointment Banner under Banner Options. Choose Disable Banner Section if you do not want banner at all.
- Click on Select video to upload the video of your choice in the Banner Section or you can also add the Youtube URL for a video.
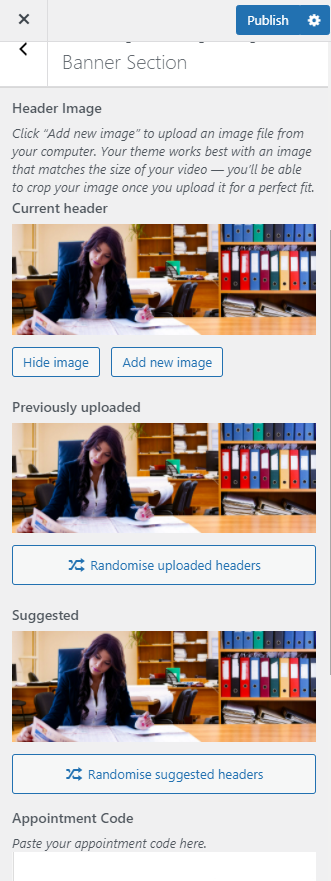
- If you want to display a static image, click on Add New Image to upload the desired image on the banner section.
- Enter the Appointment Code in the Appointment code field
- Select the alignment of the Banner Caption.
- Enable the blue button to enable banner opacity.
- Click Publish.
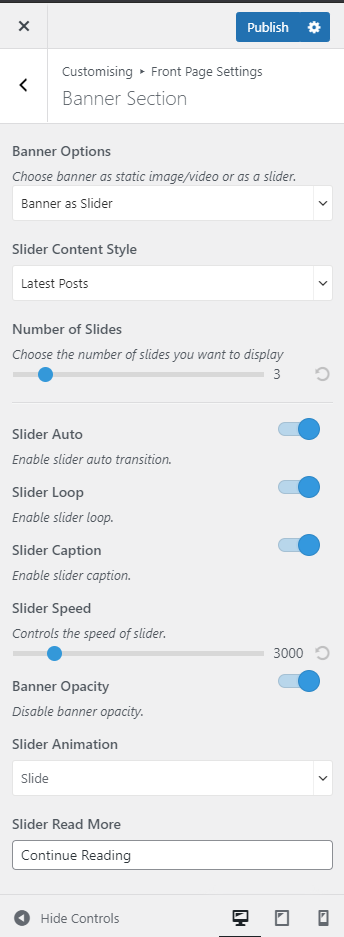
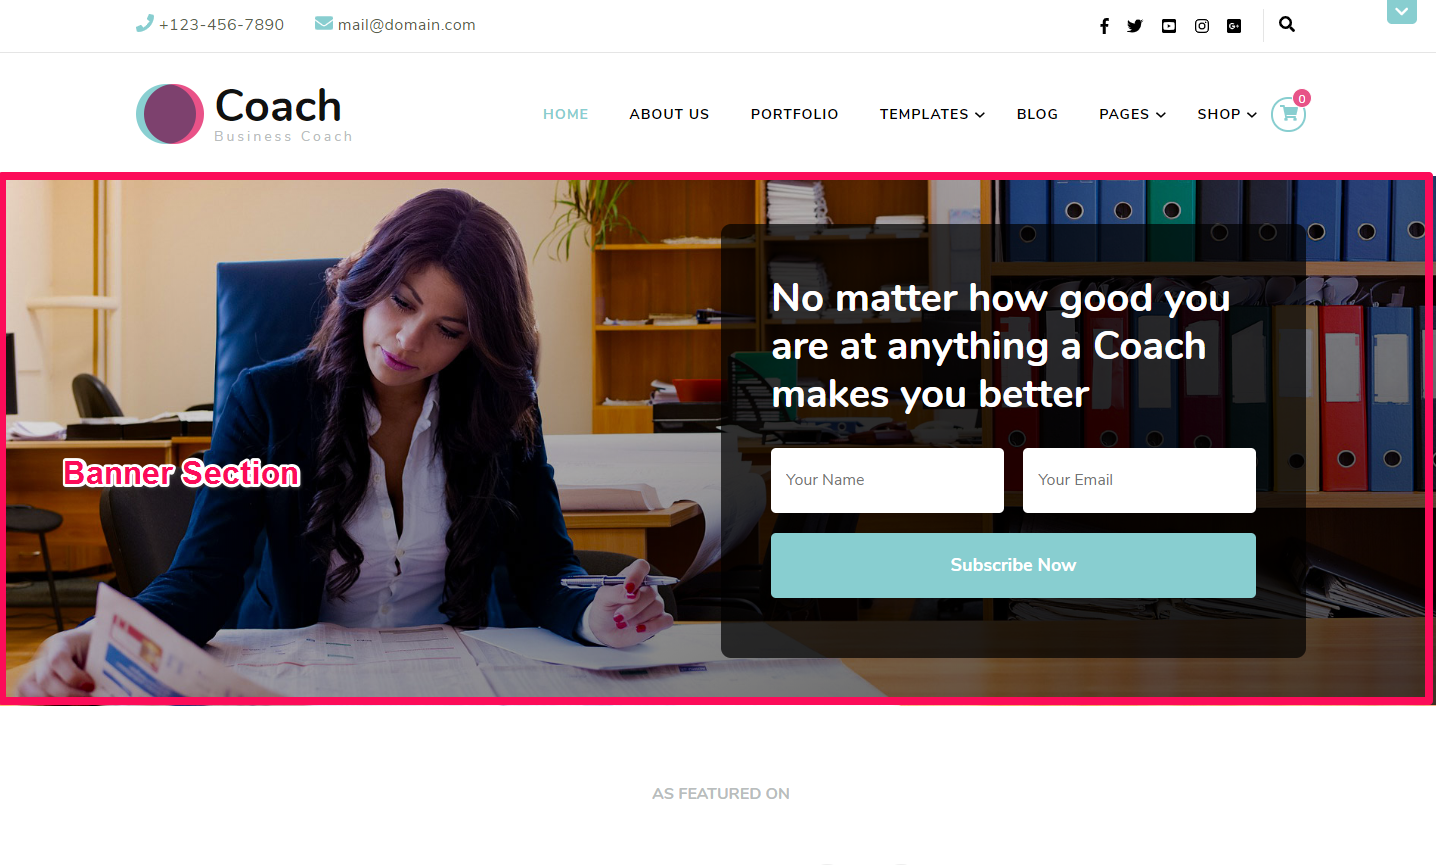
Banner as Slider
- Log in to WordPress Admin Panel.
- Go to Appearance > Customize > Front Page Settings > Banner Section
- Choose Banner as Slider under Banner Options. Choose Disable Banner Section if you do not want banner at all.
- Select either Latest Posts, Category, Pages, or Custom in the Slider Content Style. In this theme, you can even make your own Custom Slider.
- Control the number of slides to be displayed through the Number of Slides option.
- Enable Slider Auto for the auto transition of the slider.
- Enable Slider Loop for the continuation of the slider.
- Enable Slider Caption to display text on the slider.
- Select the speed of the slider.
- Enable the blue button to enable banner opacity.
- Select the animation of the slider through the Slider Animation option.
- Enter the label for the read more button in the Slider Read More field.
- Click Publish.
Note: Before you choose Latest Posts, Category, or Page in the Slider Content Style, make sure that you have created these beforehand. You can create Posts via Posts > Add New, Category via Posts > Categories and Pages via Pages > Add New. If there are not enough Posts, Categories, or Pages, a grey fallback image will appear in the Banner Section.