You can configure Testimonial Page Settings using this settings panel.
You can either follow the video or follow the below steps to configure the Testimonial Page Settings.
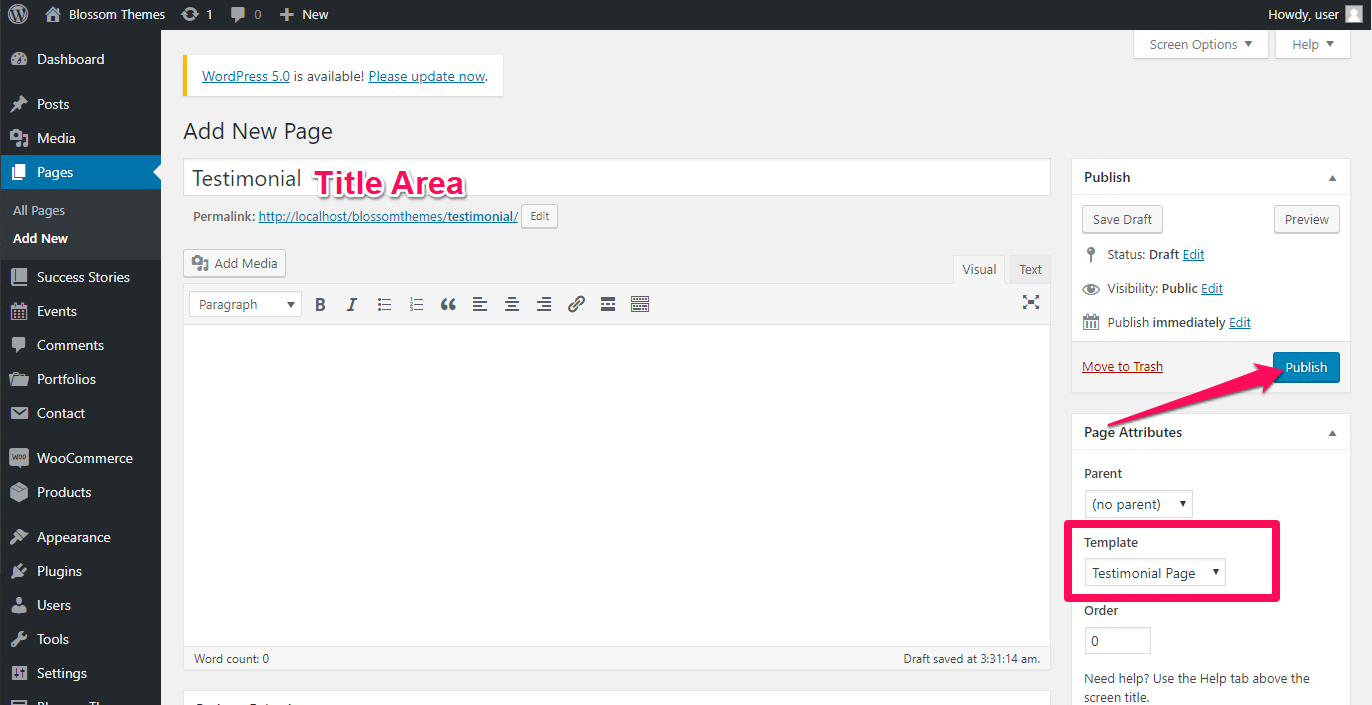
How to Create a Testimonial Page?
Note: When you create a Testimonial page, Please select the Testimonial Page template in the page attributes to get the predefined Testimonial Page template.
You need to create a testimonial page before configuring the testimonial page settings.
- Login to your WordPress Admin panel.
- Go to Pages > Add New
- Enter the Page Title
- Select the Template as Testimonial Page
- Click on Publish
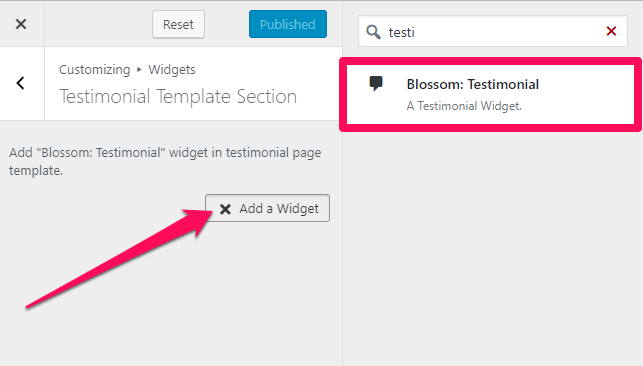
How to Configure the Testimonial Section Template?
Please follow the below steps to configure the testimonial section template.
- Login to your WordPress admin panel
- Go to Appearance> Customize> Testimonial Page Settings> Testimonial Template Section
- Click on Add a Widget
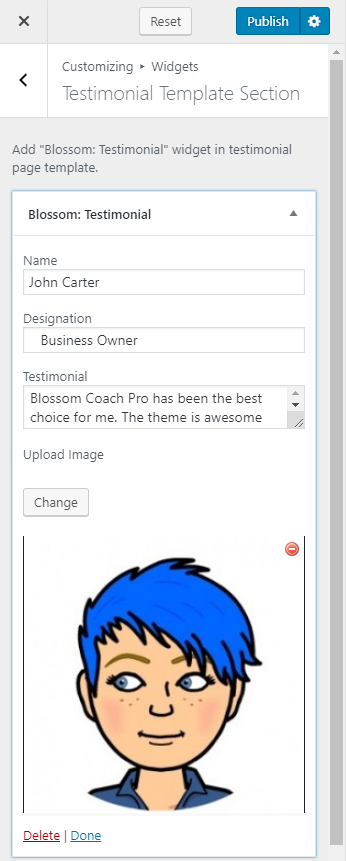
- Enter Name, Designation, and Testimonial
- Upload the image of the person
- Click on Publish
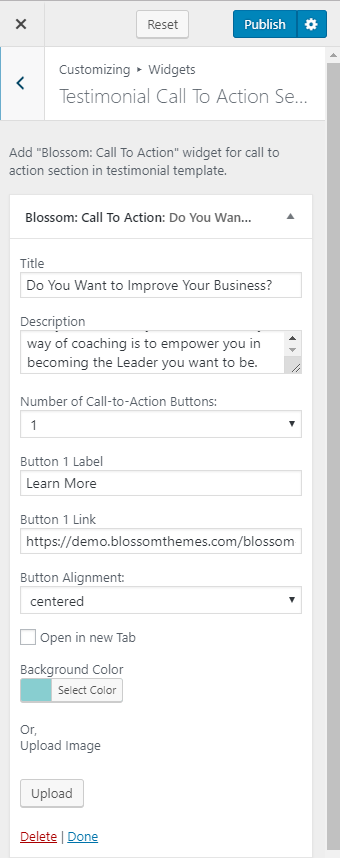
How to Configure Testimonial Call to Action Section?
Please follow the below settings to configure the testimonial call to action section.
- Login to your WordPress admin panel
- Go to Appearance> Customize> Testimonial Page Settings> Testimonial Call To Action Section
- Click on Add a Widget & Select Blossom: Call To Action

- Enter the Title & Description of the section
- Select the Number of Call to Action buttons you want to display
- Enter the Button Label & Button Link
- Select the Button Alignment & Background color
- Upload an image if you don’t want to display a single color
- Click on Publish